Some Helpful Tips / Links for MicroBlocks Users
When you are working in the IDE, as you move the mouse over the various blocks in the menus, the bottom status line will display a short description of the block your mouse is over.
Upon right-clicking any block, one can also select help and be transported to the User Guide and Block Reference pages of the MicroBlocks WIKI for a more detailed description and use examples for the block selected.
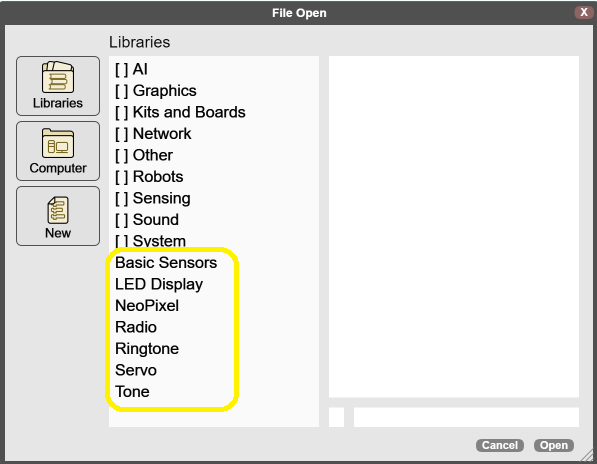
Right-click / help option also works for the main set of libraries displayed when the Libraries menu is opened, as well as for the OLED Graphics, PicoBricks, Maqueen, and HuskyLens libraries.
As you are editing in the IDE, you can right-click and use the clipboard as a copy / paste environment to move / copy blocks of code or individual blocks.
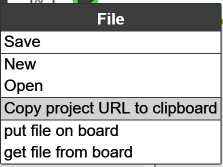
When you finalize your creation and want to share it with your friends, simply use one of the options below:
Will place an URL link to the clipboard that you can share or post onto web sites. This and the normal File/Save options creates a complete copy of the program.
When the URL is clicked, a MicroBlocks browser window will open up with your project loaded.
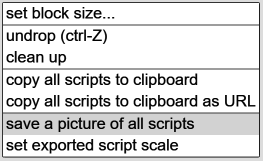
A picture of the visible parts of your program in the IDE will be generated as a PNG image file. It will contain the code of your program (global variables and user-defined functions that are not actually used by the scripts are not included) embedded as an extended header option. You can send this image file to anyone. Due to the fact that global variables and user-defined functions are not included in this version, it is not to be relied upon as a recovery file for the original program source.
When this image is dragged/dropped onto the MicroBlocks IDE, it will load your program ready to run.
When your program is in good running order, it is stored on the board connected to your PC with an USB cable. Please note that this stored version is somehow abbreviated and does not contain comments and script positions saved on the board. When you disconnect the cable, your code stays on the board.
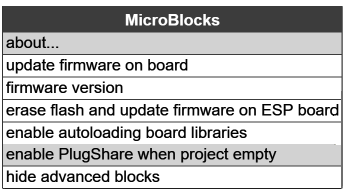
Now, enable the plugshare option shown in the menu, and select NEW from the File menu to clear the IDE. When you plug in the board, your program will be loaded and ready to run. Due to the fact that script positions and comments are not included in this version, it is not to be relied upon as a recovery file for the original program source.
But the best part is, you can give your microcontroller to someone else, or take it to another PC and plug it in. And with the IDE settings as above, you can start running your program on the new PC.
Our WIKI is full of very useful information on programming with MicroBlocks, as well as the variety of micro controller boards supported. One of the unique features is that your program is totally transferable to any of the supported boards, provided the feature sets are compatible. Even if your program uses blocks that are using a features not supported on the new board, MicroBlocks will simply ignore those blocks and your program will work without a problem.
Enjoy the physical computing and real-time programming with PicoBricks and MicroBlocks .
Howdy, Stranger!
Categories
- 130 All Categories
- 4 Community
- 4 Hello Maker!
- 109 PicoBricks - Make, Run, Split, Merge
- 2 PicoBricks IDE
- 1 Arduino IDE
- 35 Hardware Support
- 15 PicoBricks Backers Hub
- 51 MicroBlocks Support
- 3 Shipping Support
- 2 MicroPython
- 1 REX - 8 in 1
- Mechanical Parts and Parkour
- REX Main
- 1 Arduino-IDE
- REX - Shipping
- 16 Products & Technology
- 2 Raspberry Pi
- Arduino
- 14 Other


