Best Of
Re: Software to Program PicoBricks
Hello.
I have tried all the graphical programming software packages and in my opinion each of them has a different scope of users.
For me the most powerful in terms of library availability are Mixly and BlocklyDuino Editor F2. I recommend both for more complex projects.
Min+ and microBlock are very suitable tools for education and I recommend them for users with little programming experience.
The new PicoBricks IDE package has good features for teaching at Secondary Education levels. It incorporates the possibility of programming graphically at two levels and also includes programming in Python. The idea of including a simulator is very interesting and distinguishes this software among others.
Lottery game
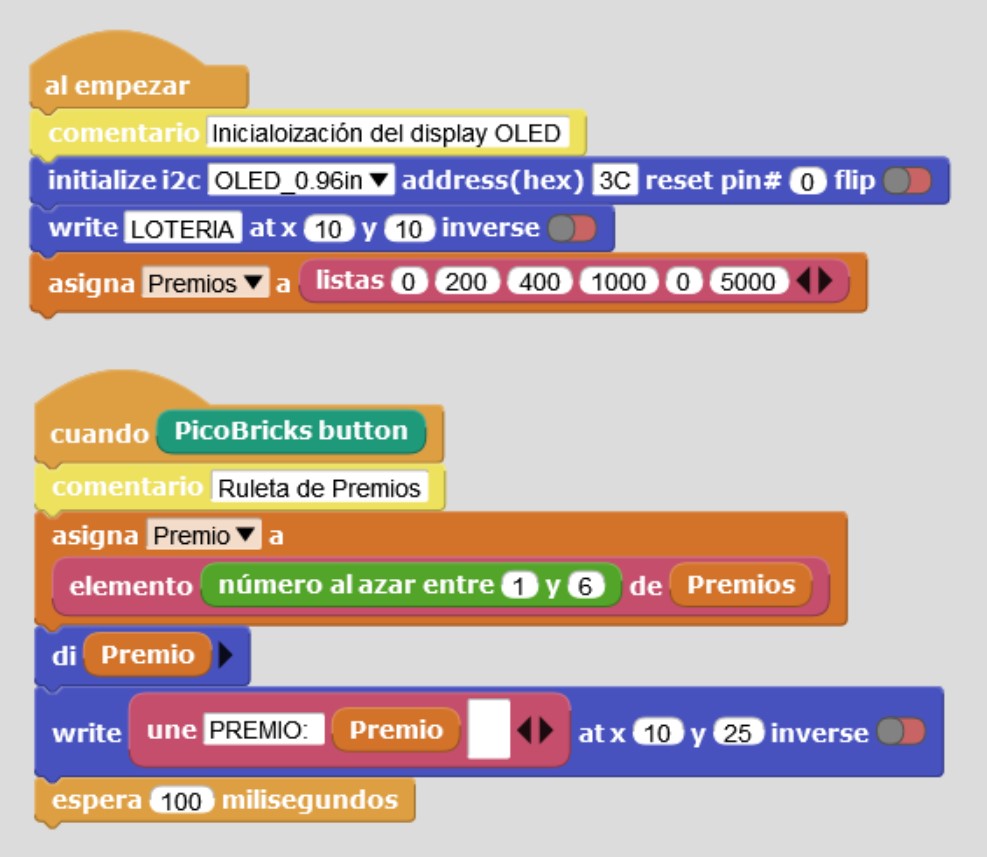
I have made this sketch in order to use the list functionality with MicroBlocks.
When we click on the PicoBricks GP10 Button, one of the prizes configured in the "Prizes" list will be shown on the OLED display. The generation of the prize is done using the function "random number"
PicoBricks Hearing Test Project
PicoBricks Hearing Test Project
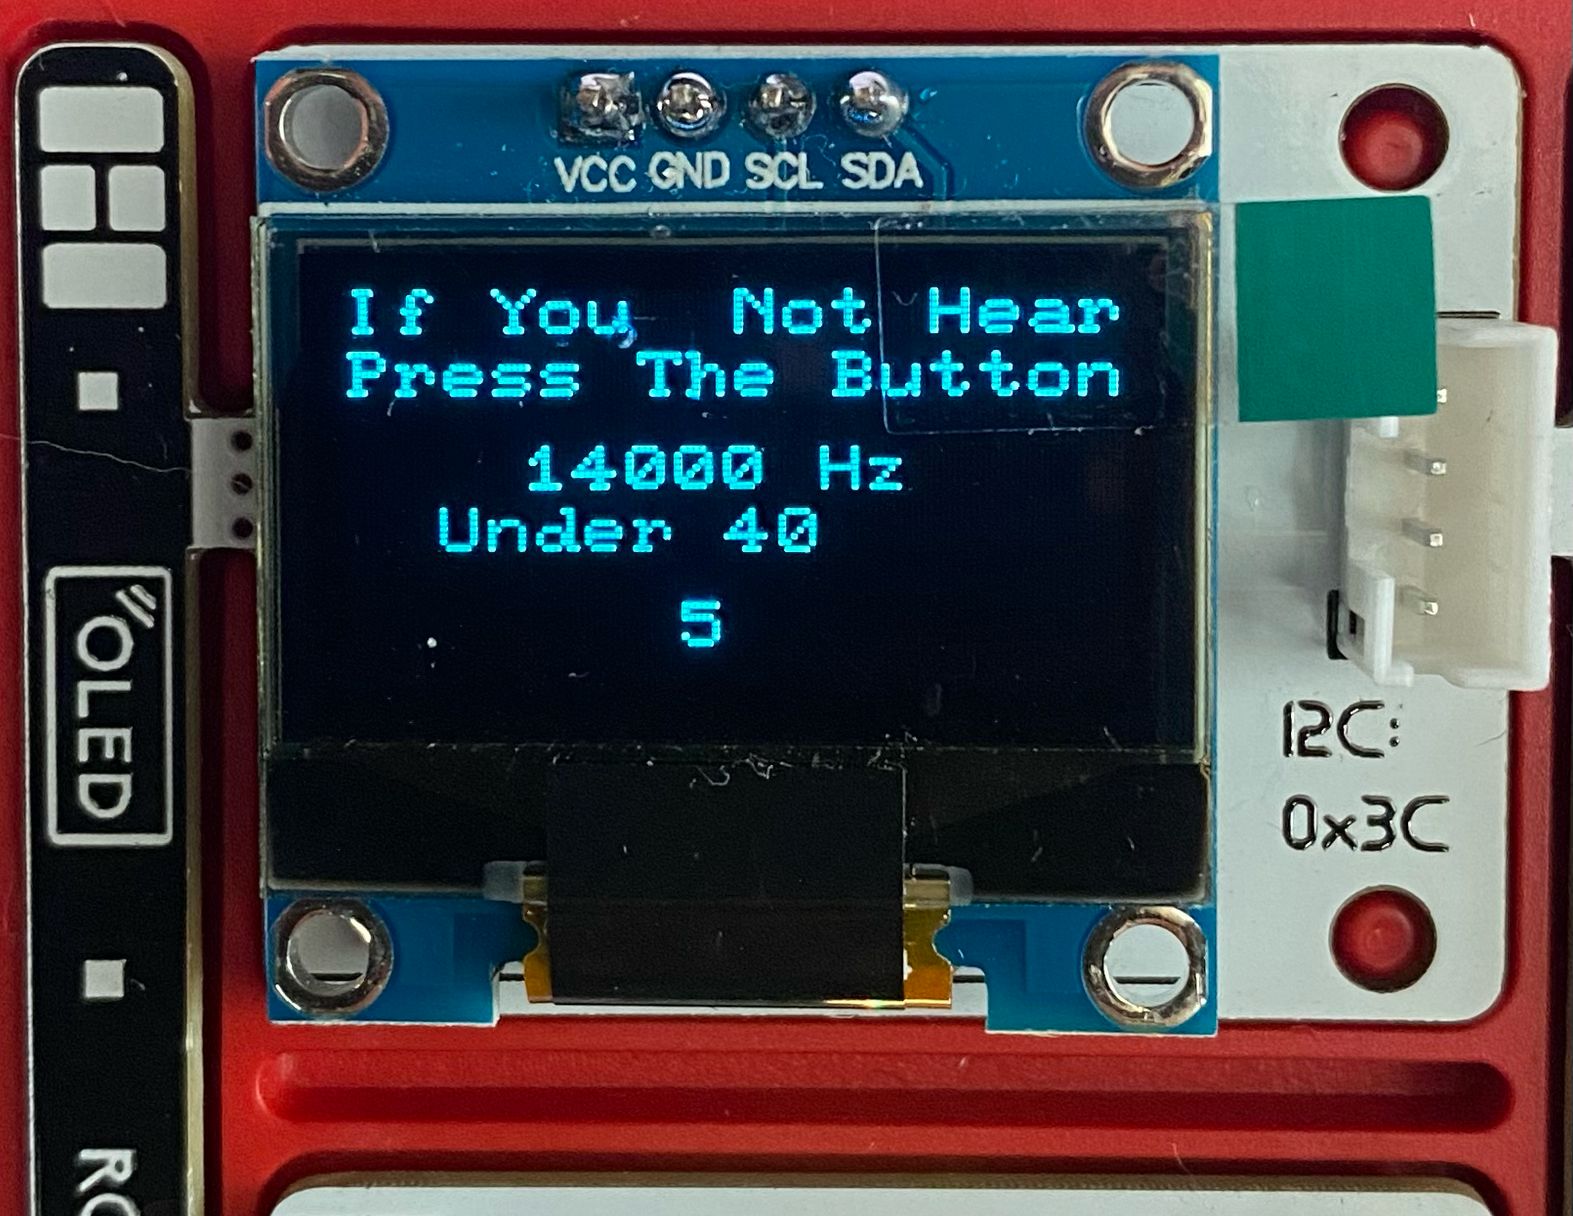
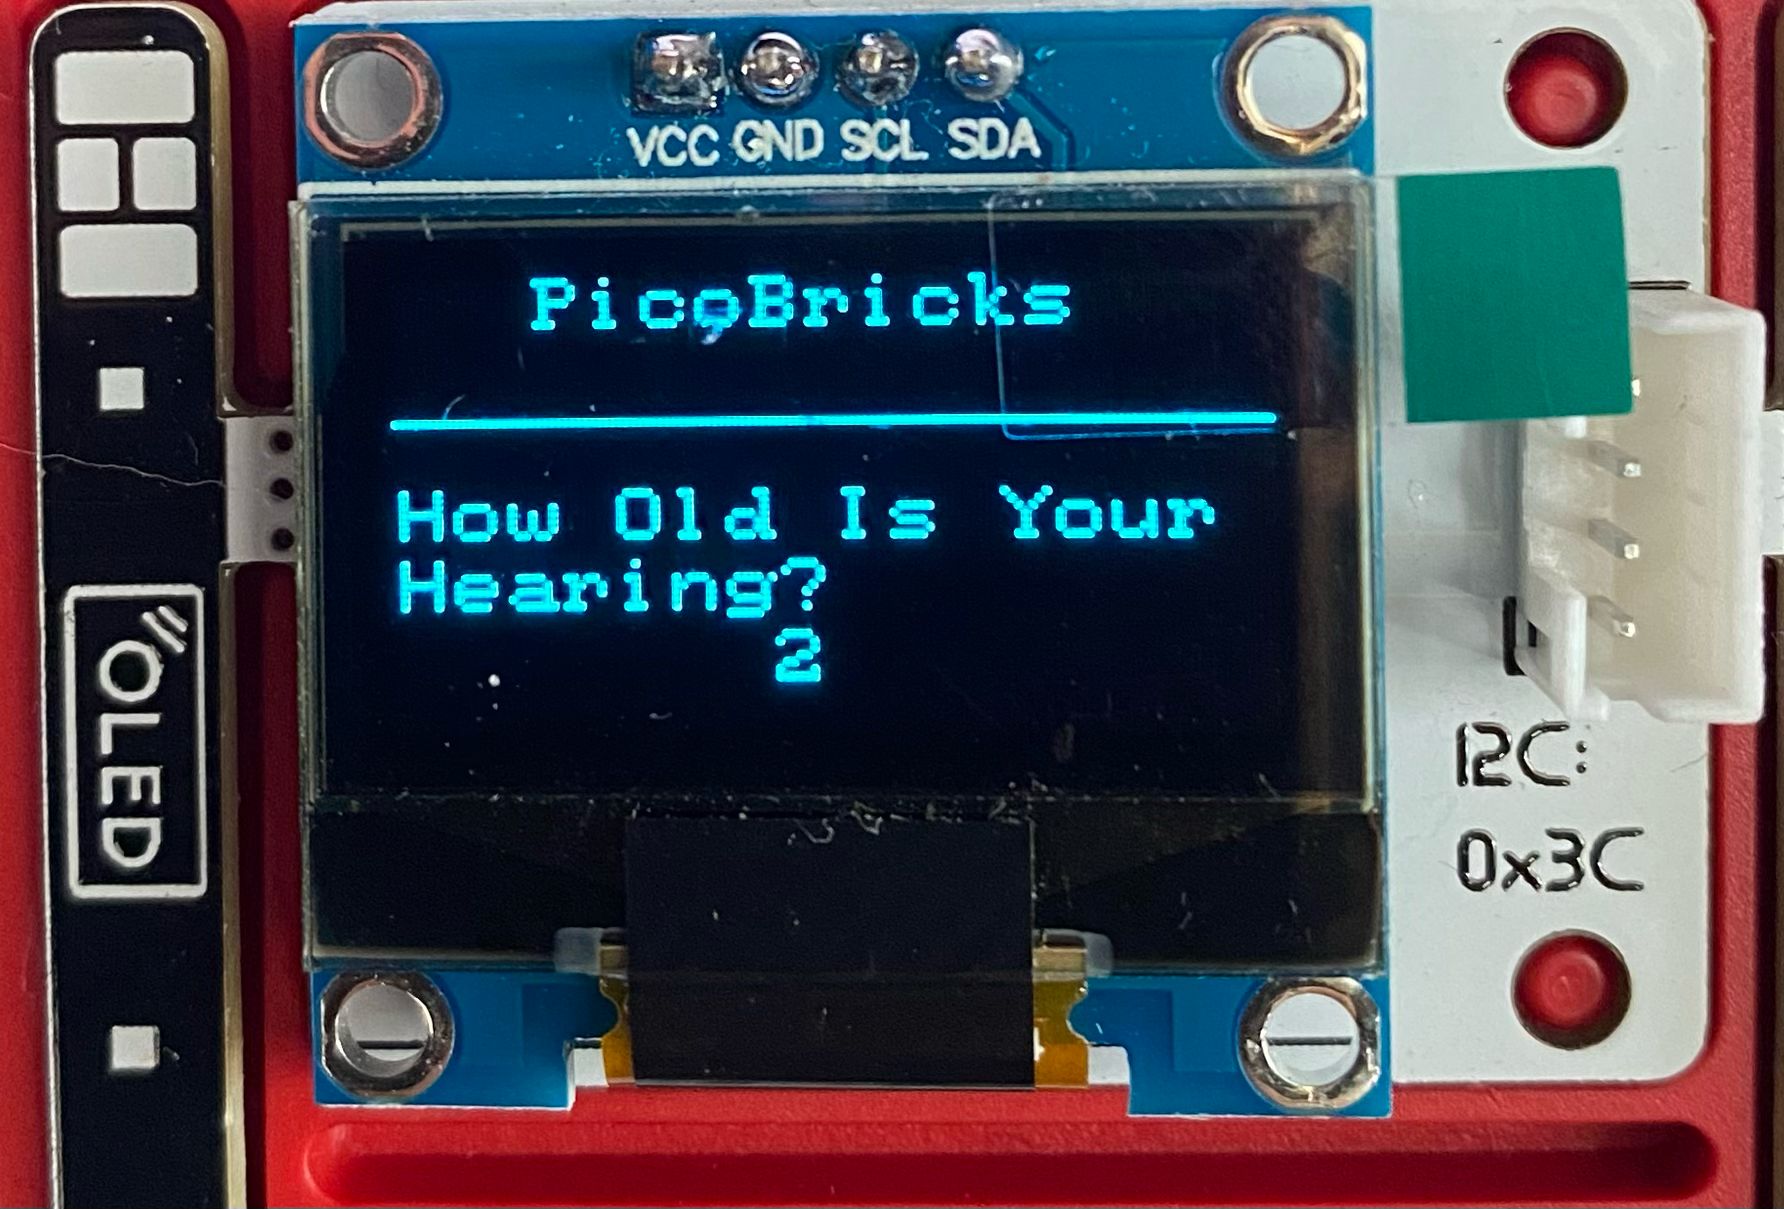
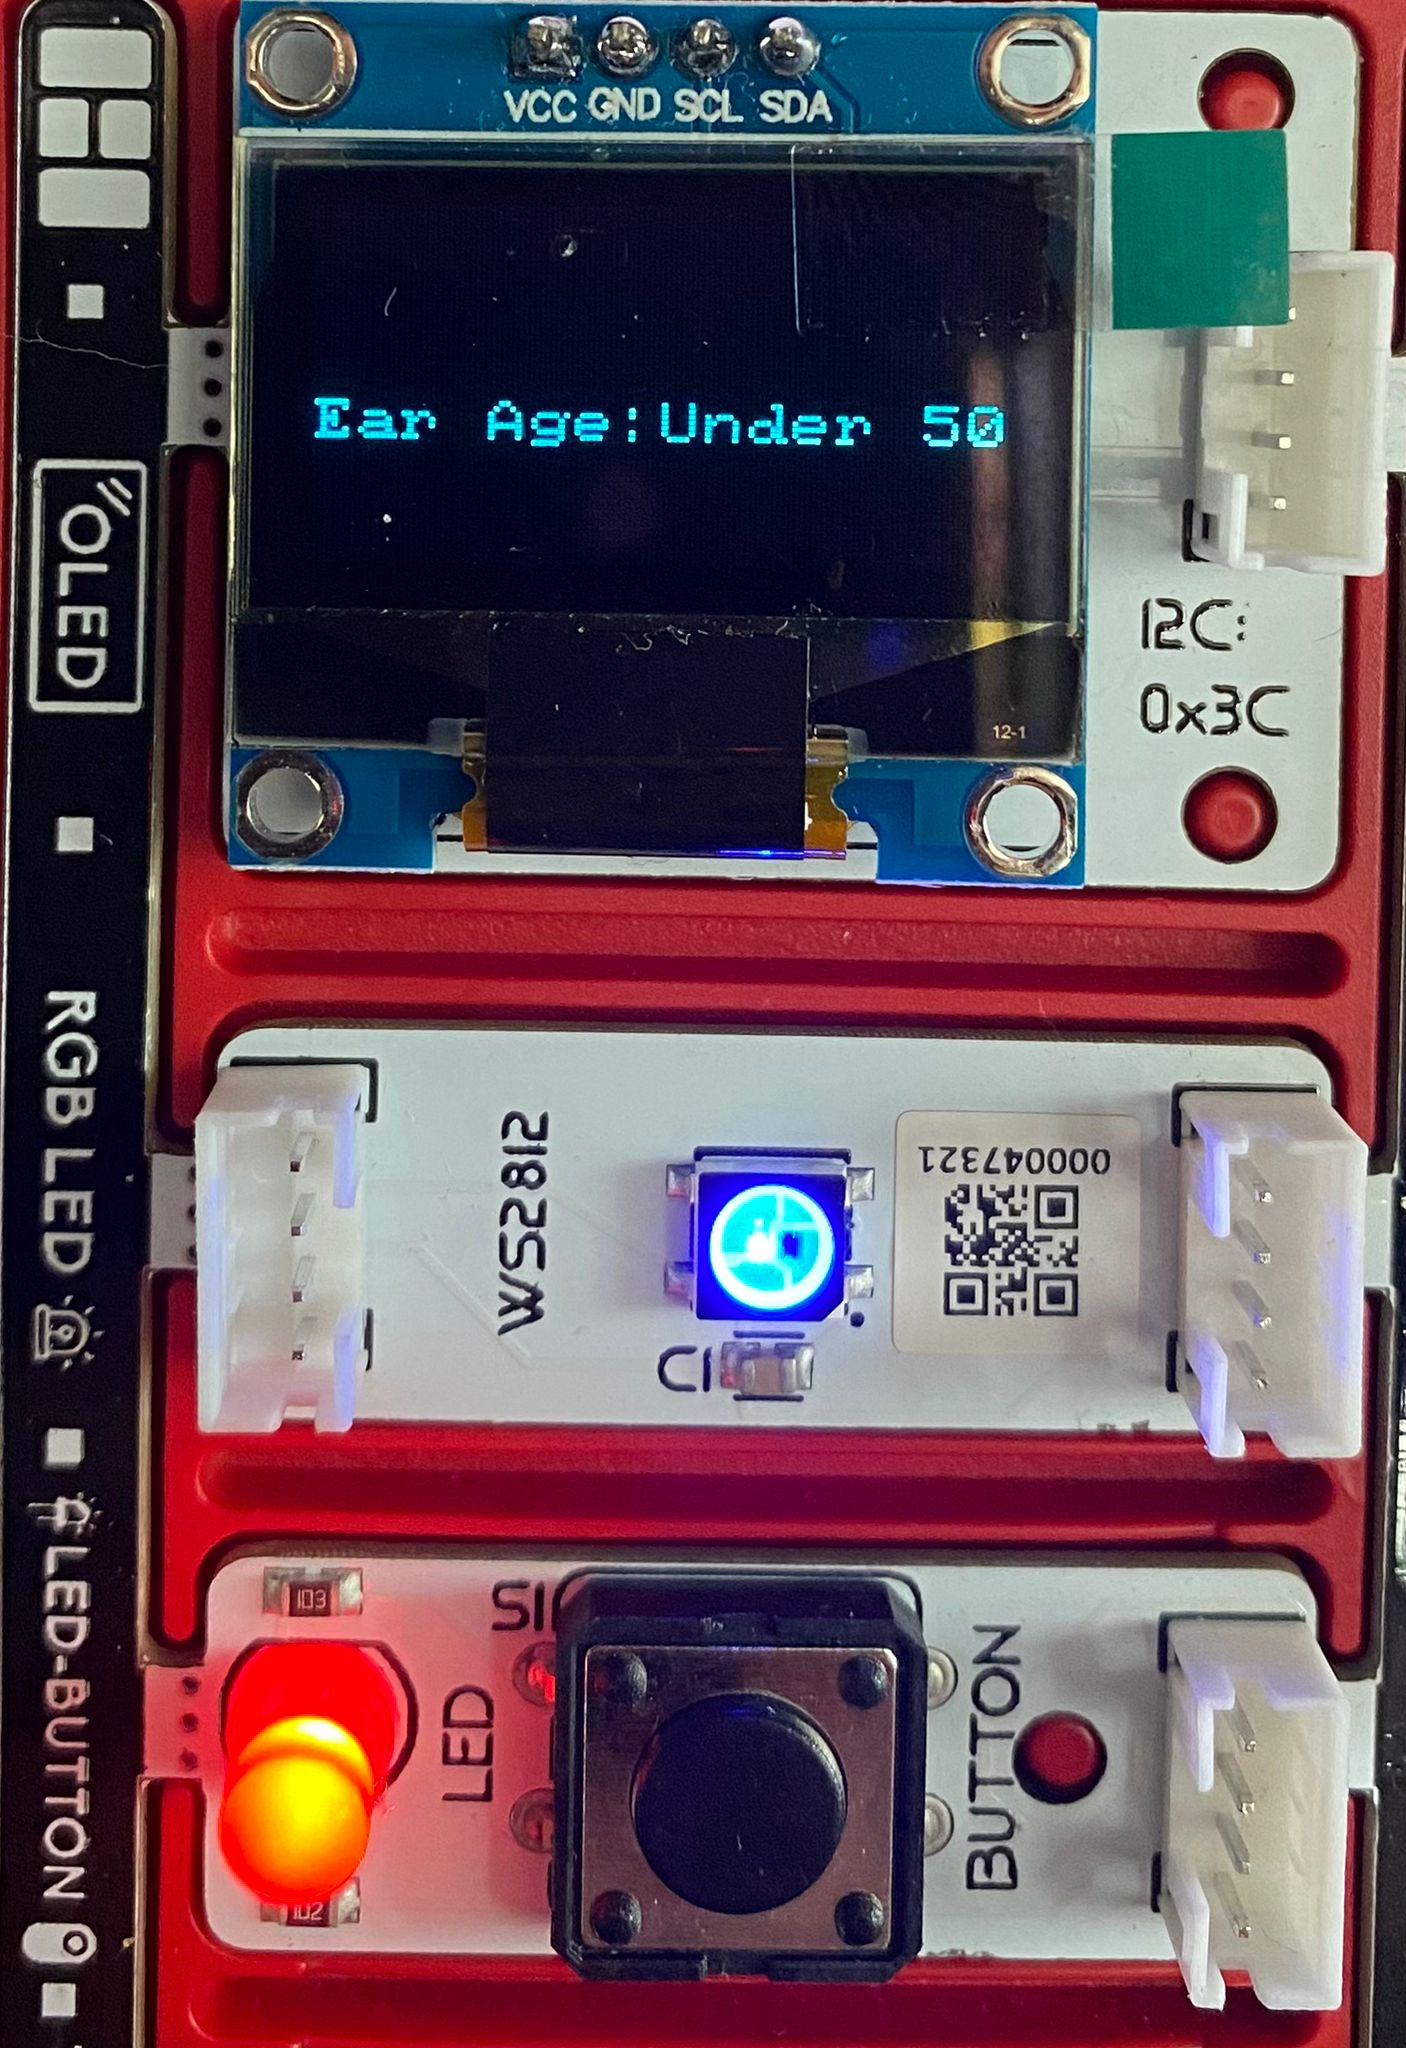
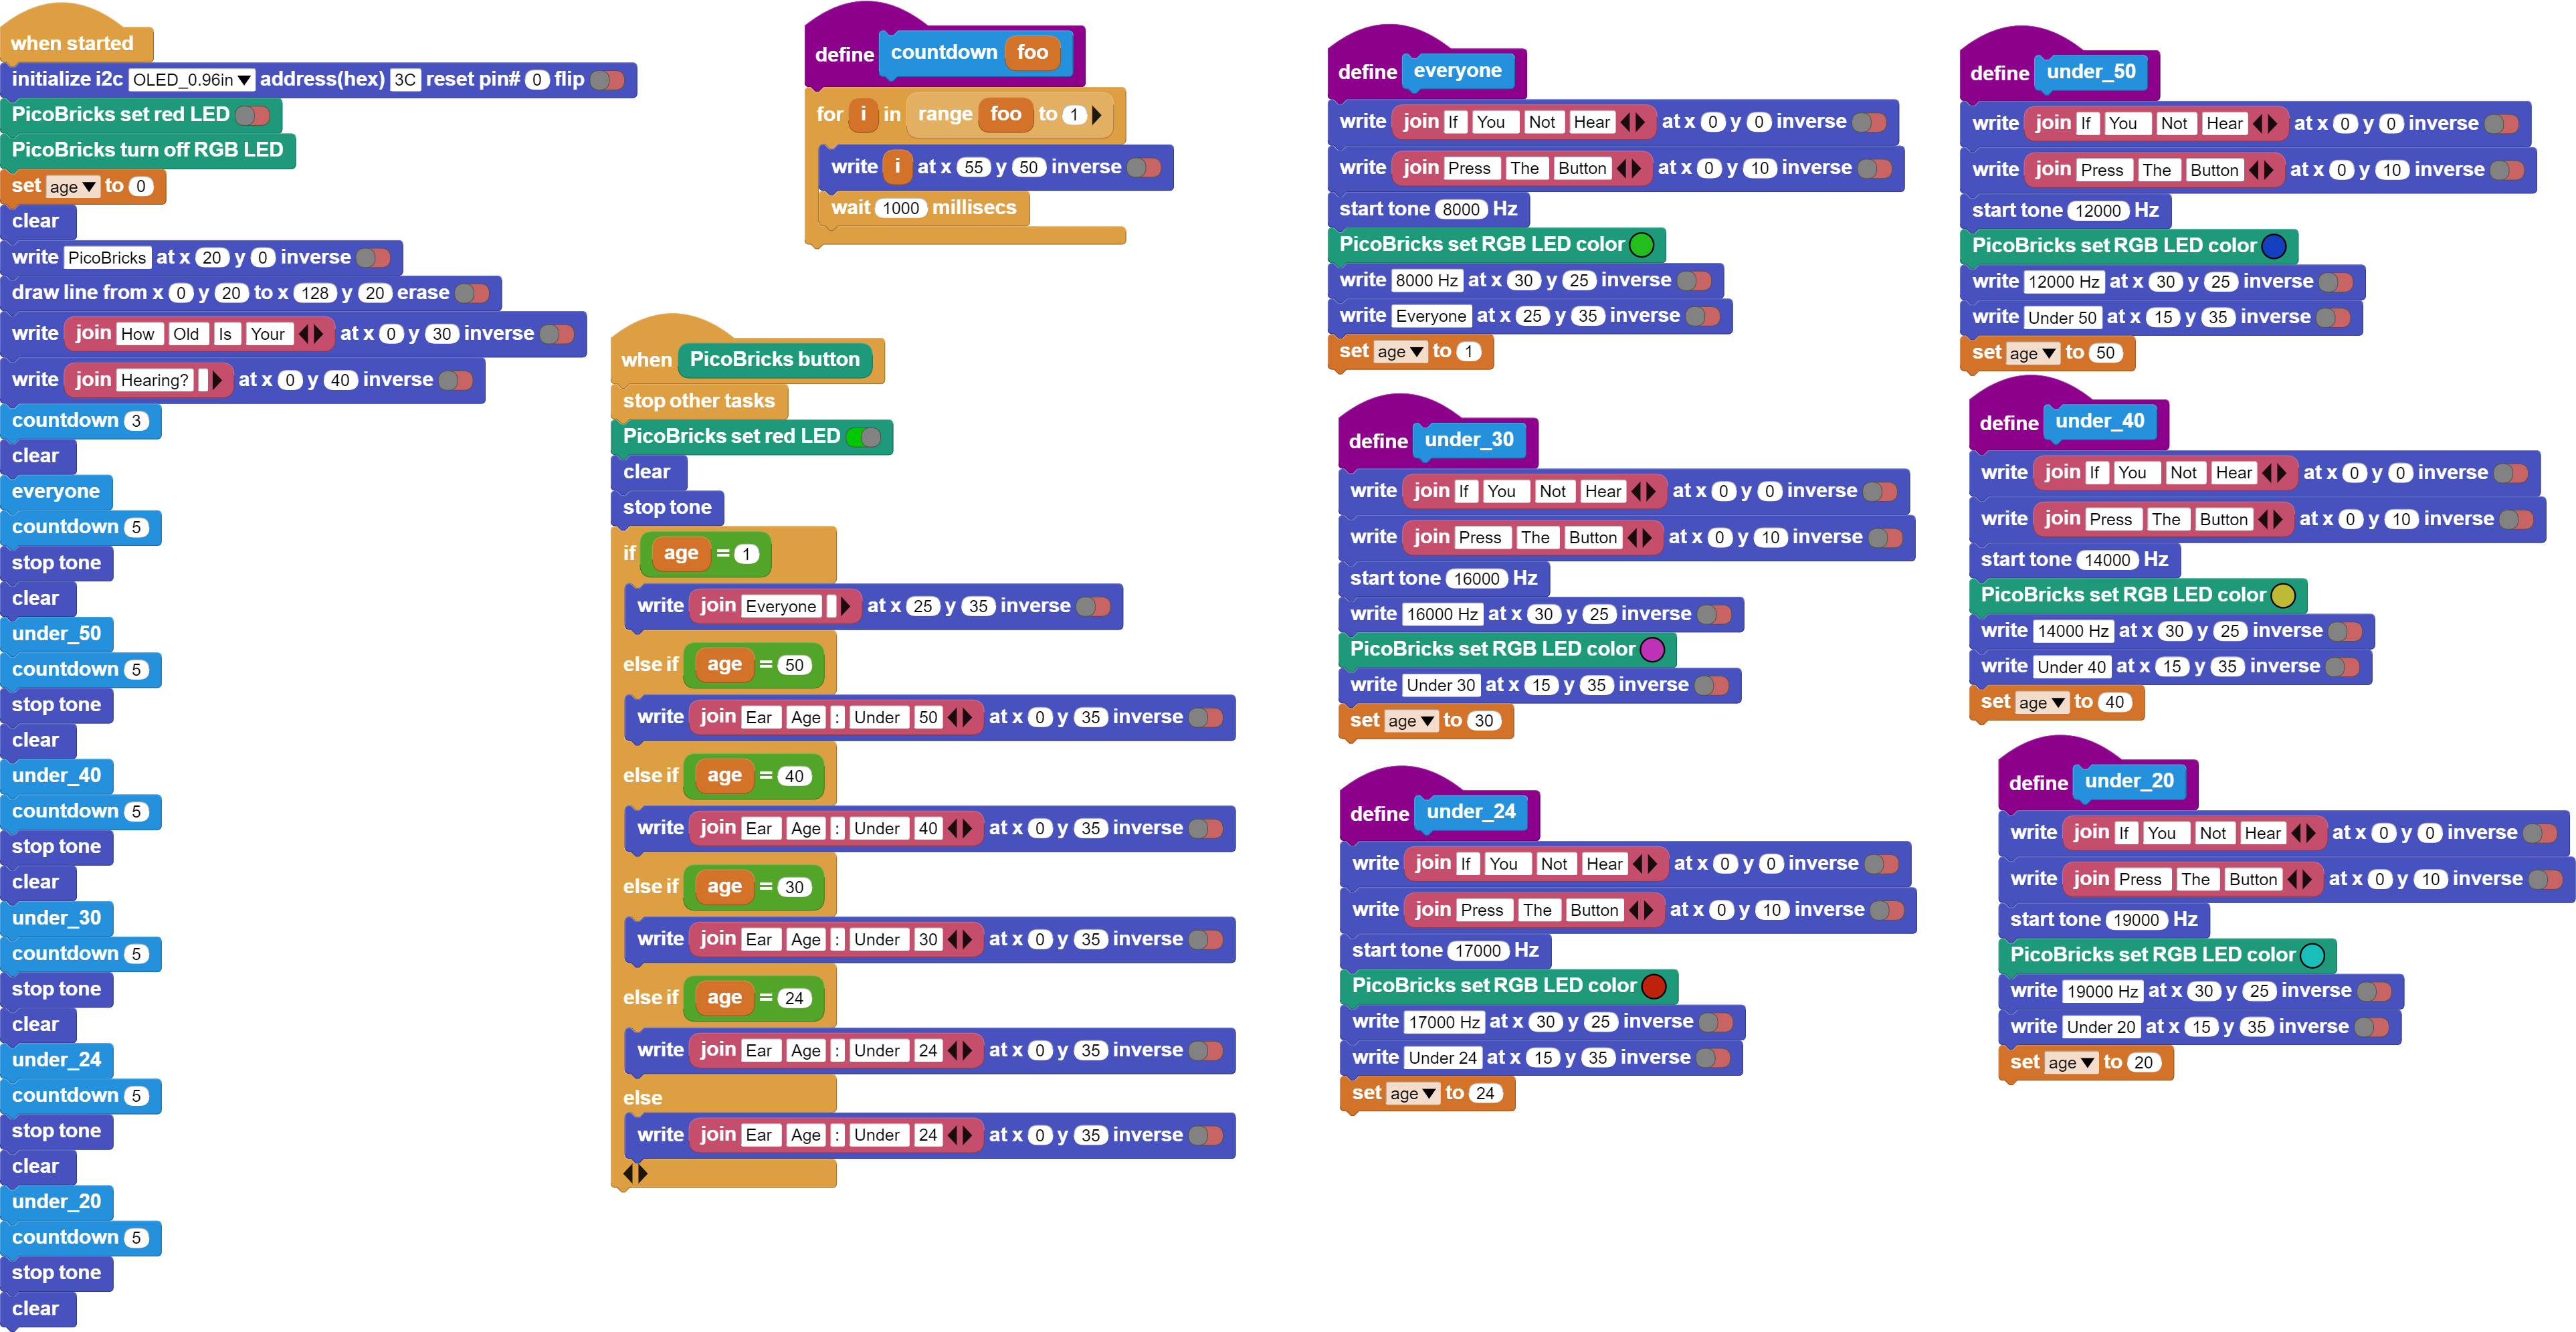
We can detect our ear age by using PicoBricks buzzer and button module. Let's test whether we can hear the sound by increasing the frequency of the buzzer systematically with the button.
As people get older, they cannot hear certain frequencies. This situation determines our ear age. For example;
- Anyone who is not deaf can hear a sound with a frequency of 8000Hz.
- Anyone who is under 50 age can hear a sound with a frequency of 12000Hz.
- Anyone who is under 40 age can hear a sound with a frequency of 14000Hz.
- Anyone who is under 30 age can hear a sound with a frequency of 16000Hz.
- Anyone who is under 24 age can hear a sound with a frequency of 17000Hz.
- Anyone who is under 20 age can hear a sound with a frequency of 19000Hz.
We can produce the sound at any frequency we want by using the buzzer module from PicoBricks modules. Let’s do a project that tests our ear age. The necessary modules for this project are:
- Buzzer
- Button & LED
- OLED Screen
- RGB LED
Project Video: https://twitter.com/selimgayretlii/status/1654429539693481986
Project Images
PicoBricks V1.2
MicroBlocks Code of The Project:
MicroBlocks NEW Features #2 - TFT Library Support
This one will be of great interest to PicoBricks Users. It is available in the Pilot release 1.2.20 FW 188 now, and will be in the next stable release, early next week.
As you know, the OLED Graphics Library is the one you have been using for displaying anything on the OLED display. However, with all it's great features like buffered compositions, animations, wrap control, sprites, etc, it exacts a heavy memory toll on your projects at 26K.
To lighten up the memory footprint at the expense of a some features, we are now supporting display capability using the TFT Library. With only a 3K size, it is the perfect tool for projects that do not need all the fancy capabilities of the OLED Graphics Library.
You can display simple geometric shapes and write text. You get the benefit of full set of 256 ASCII characters, as opposed to the 96 character set of the OLED Library. Text can be scaled from 1 to 21, allowing you to highlight parts of your information display.
While the TFT Library blocks support full color range of various displays, the OLED display being black & white, there are only two options: black or any other color value displayed as white.
To assist with display refresh issues, there are two new blocks: defer and resume TFT display updates. These allow the user to print something to the display without actually showing it on the screen, until the resume block is executed.
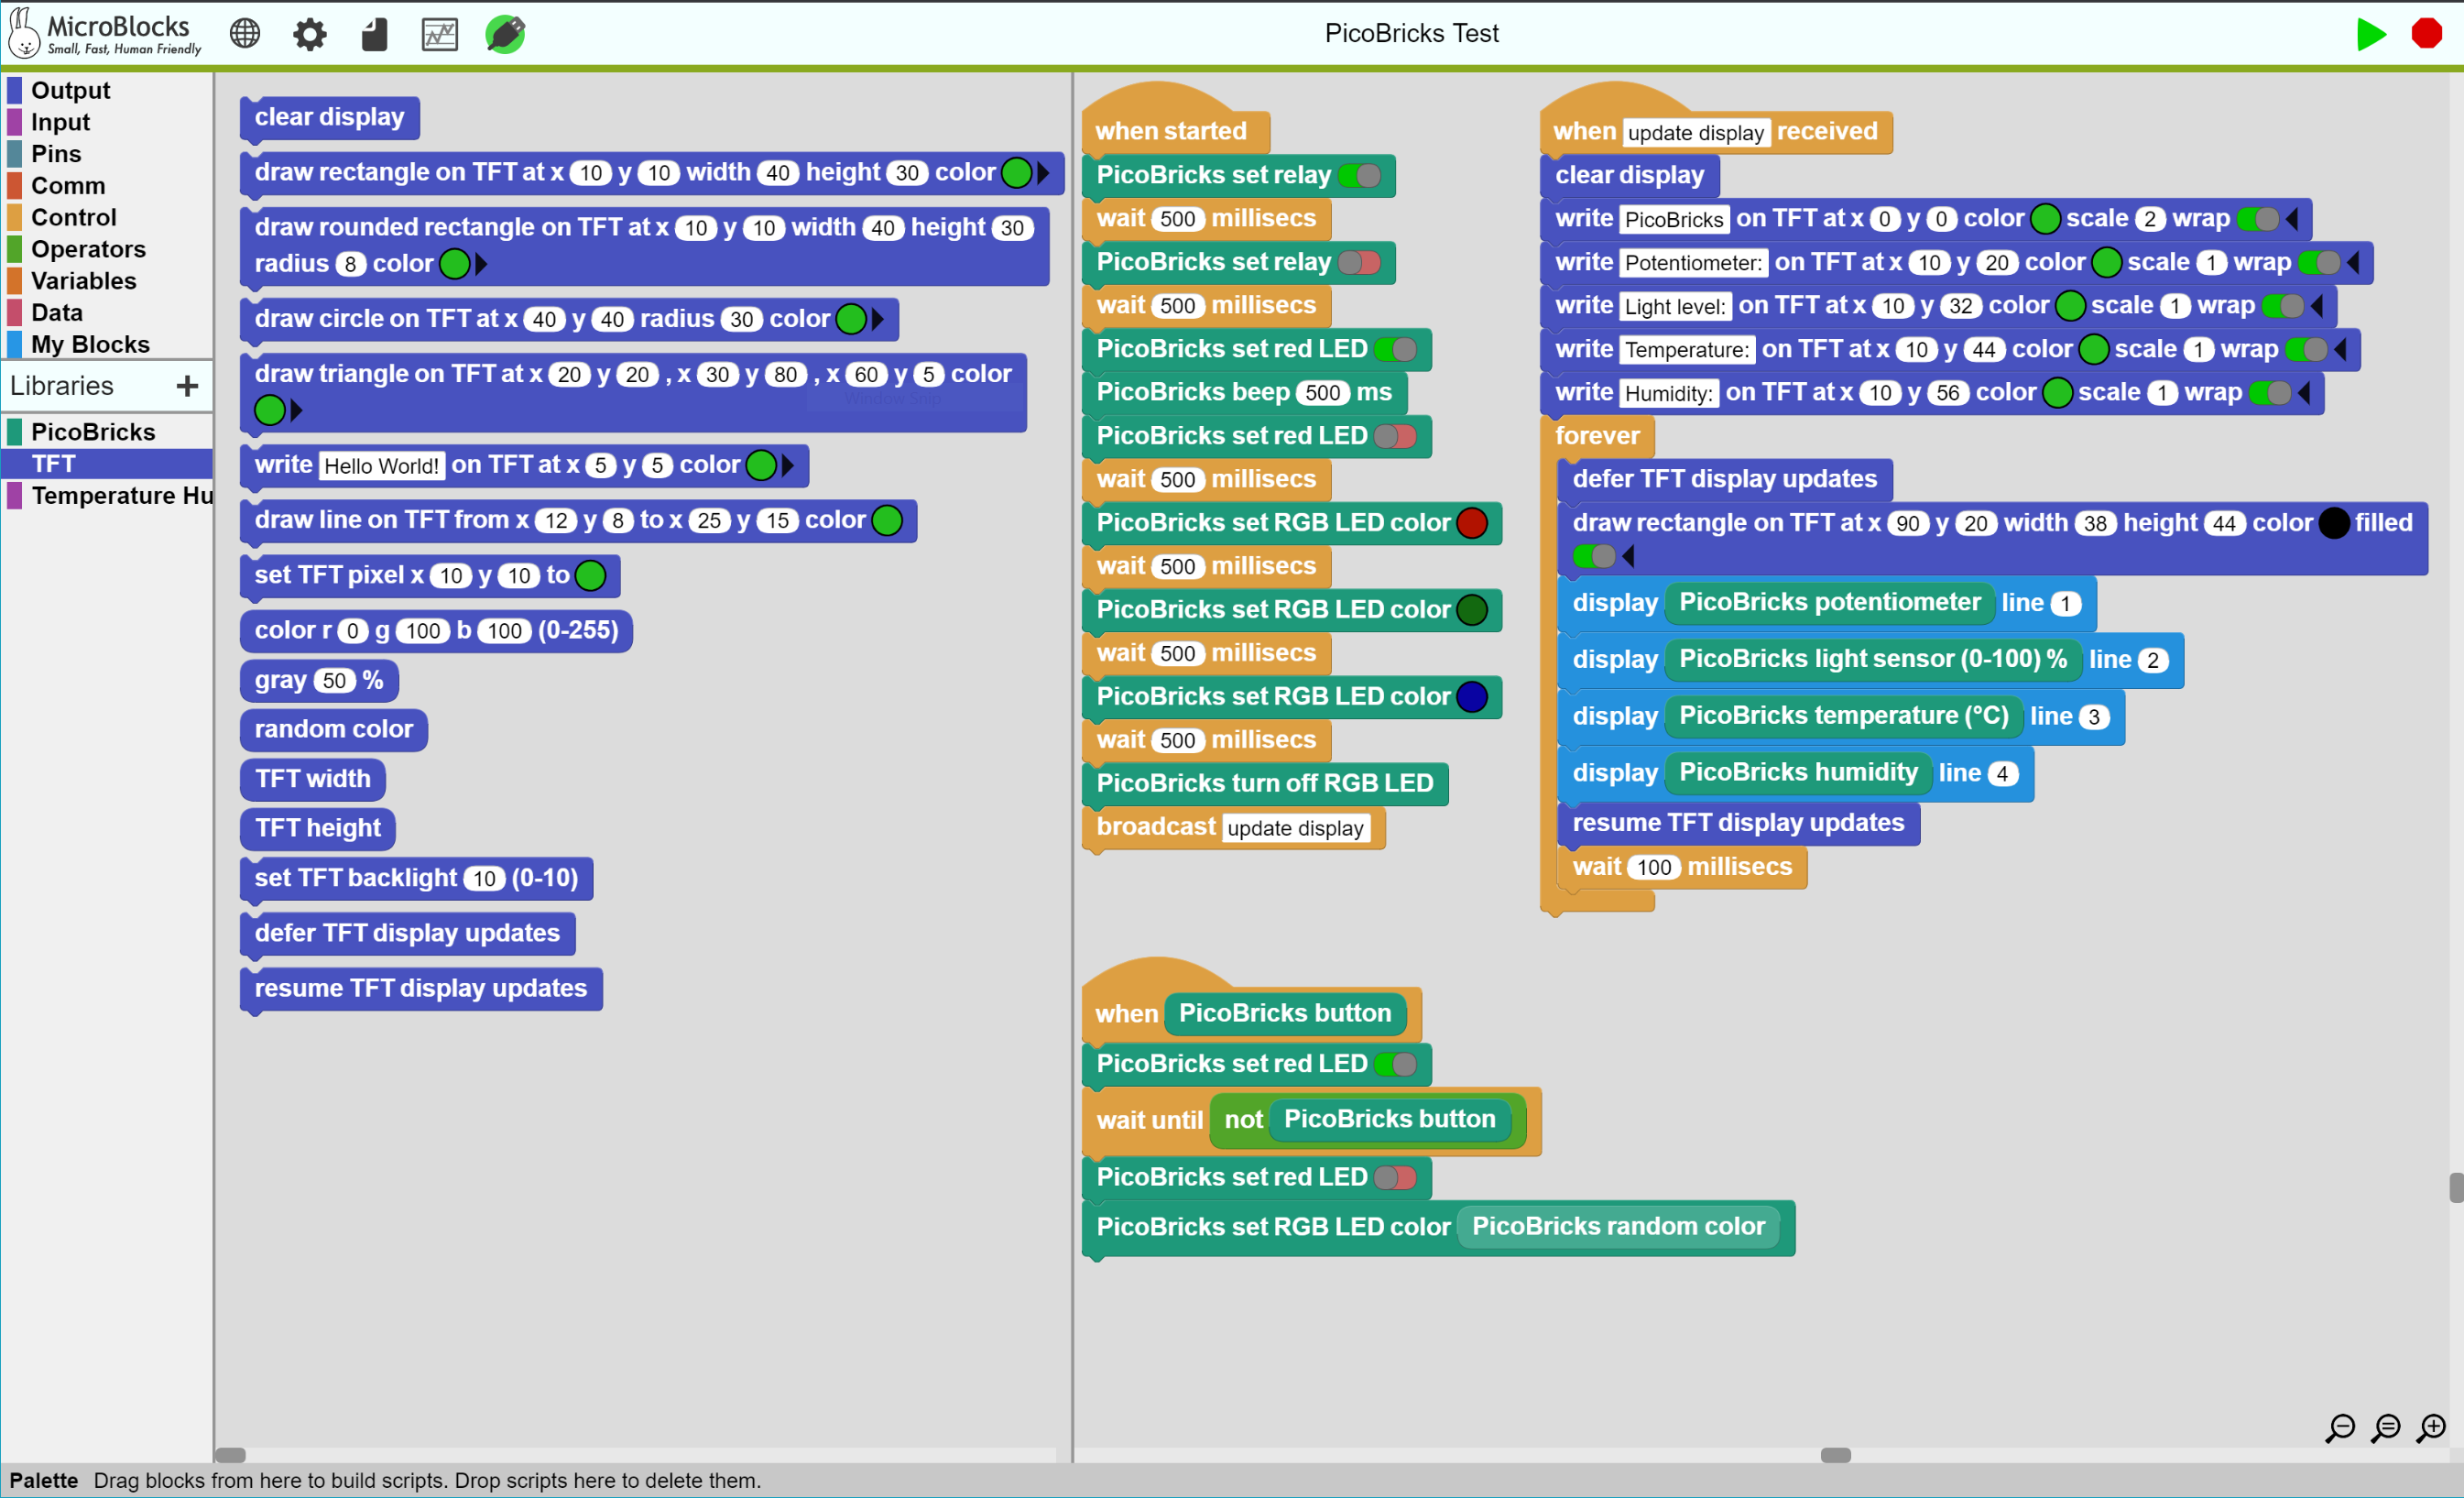
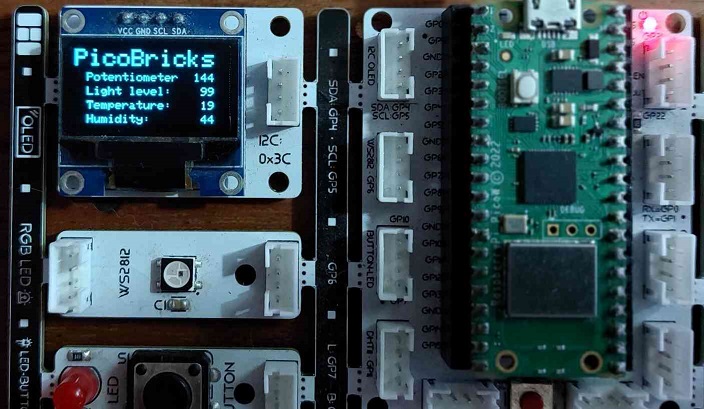
We have provided an example program (PicoBricks Test) in the File / Open / Other / Examples menu, to help anyone start to experiment with the Library. It will display some of the sensor values of the PicoBricks kit.
In the example program, we are using the defer feature to collect all four sensor values, right-justify them, and write them, before resuming the display updates and actually displaying the end result.
NOTES:
- If you have any projects written to work with the original OLED Graphics Library, and you want them to work with the TFT Library, you will need to modify your code to use the TFT Library blocks. Your old code will not function automatically with the new library.
- The two Libraries have their own respective buffers. While it is technically possible to engage both of them, you will not be able to combine the display buffers from the two different libraries. However, you can use them in the same project one at a time, paying attention to which one has control of the display.
Enjoy.
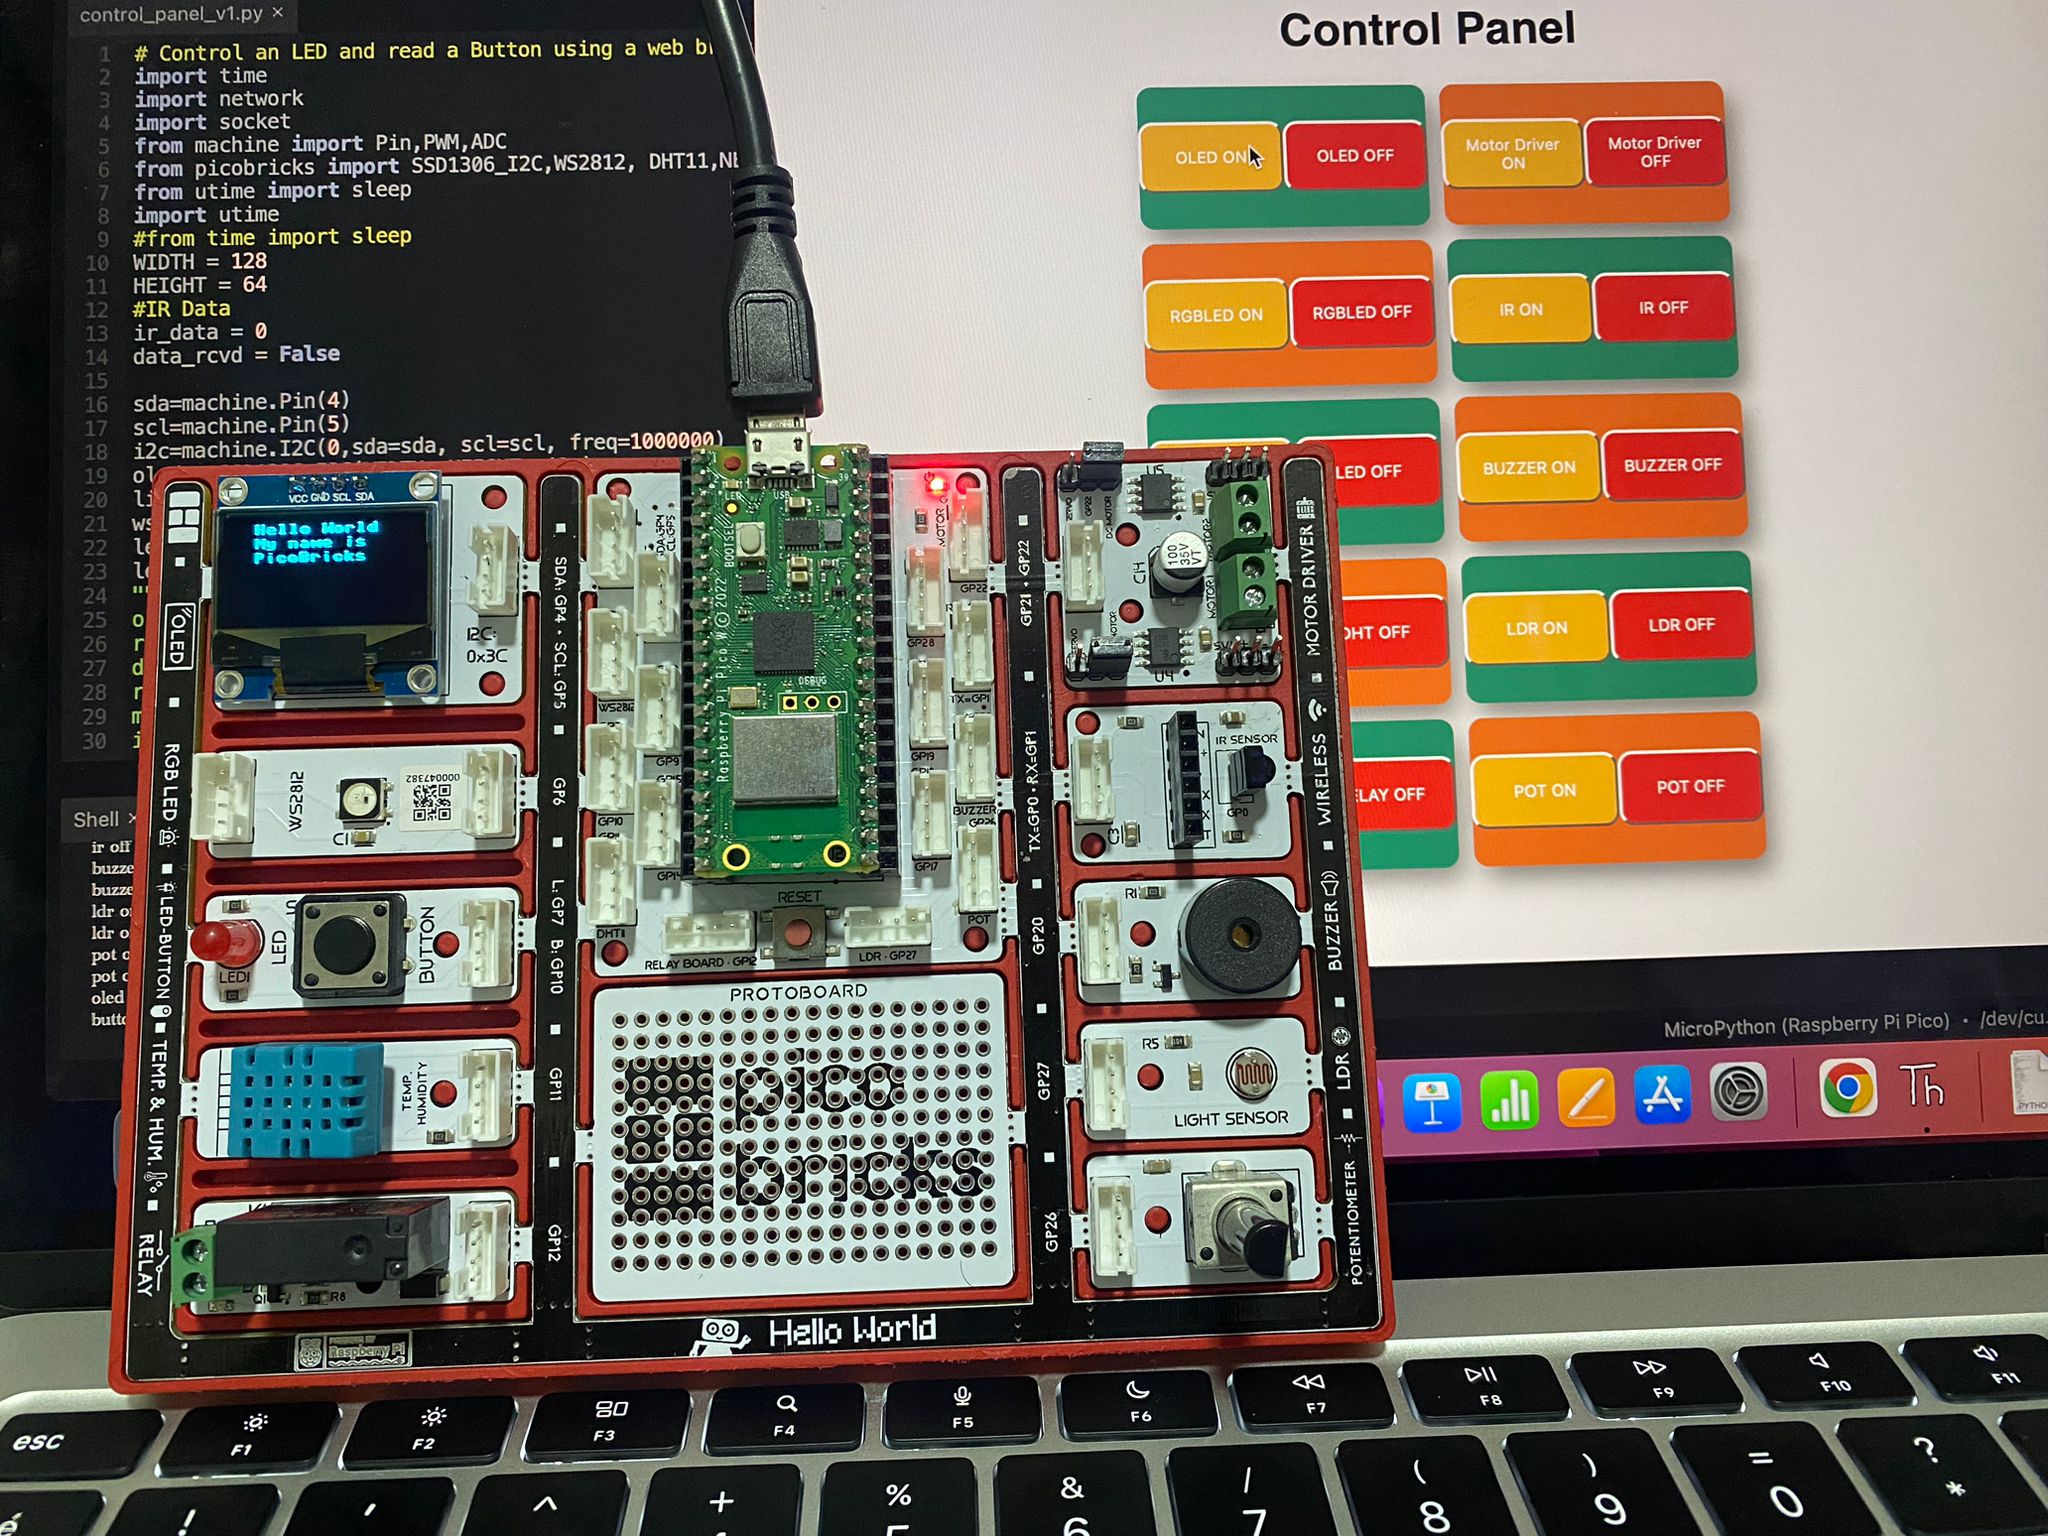
PicoBricks Control Panel
With Raspberry Pi Pico, you can control PicoBricks modules remotely.
MicroPython Code of The Project:
GitHub: https://github.com/Robotistan/PicoBricks/blob/main/Software/Examples%20from%20Community/Control%20Panel/README.md
Project Details:
- Enter your Wi-Fi ID and password inside the MicroPython code.
- Log in by typing the IP address on the OLED screen and serial port into Google search.
- You can control PicoBricks modules from the “Control Panel”.
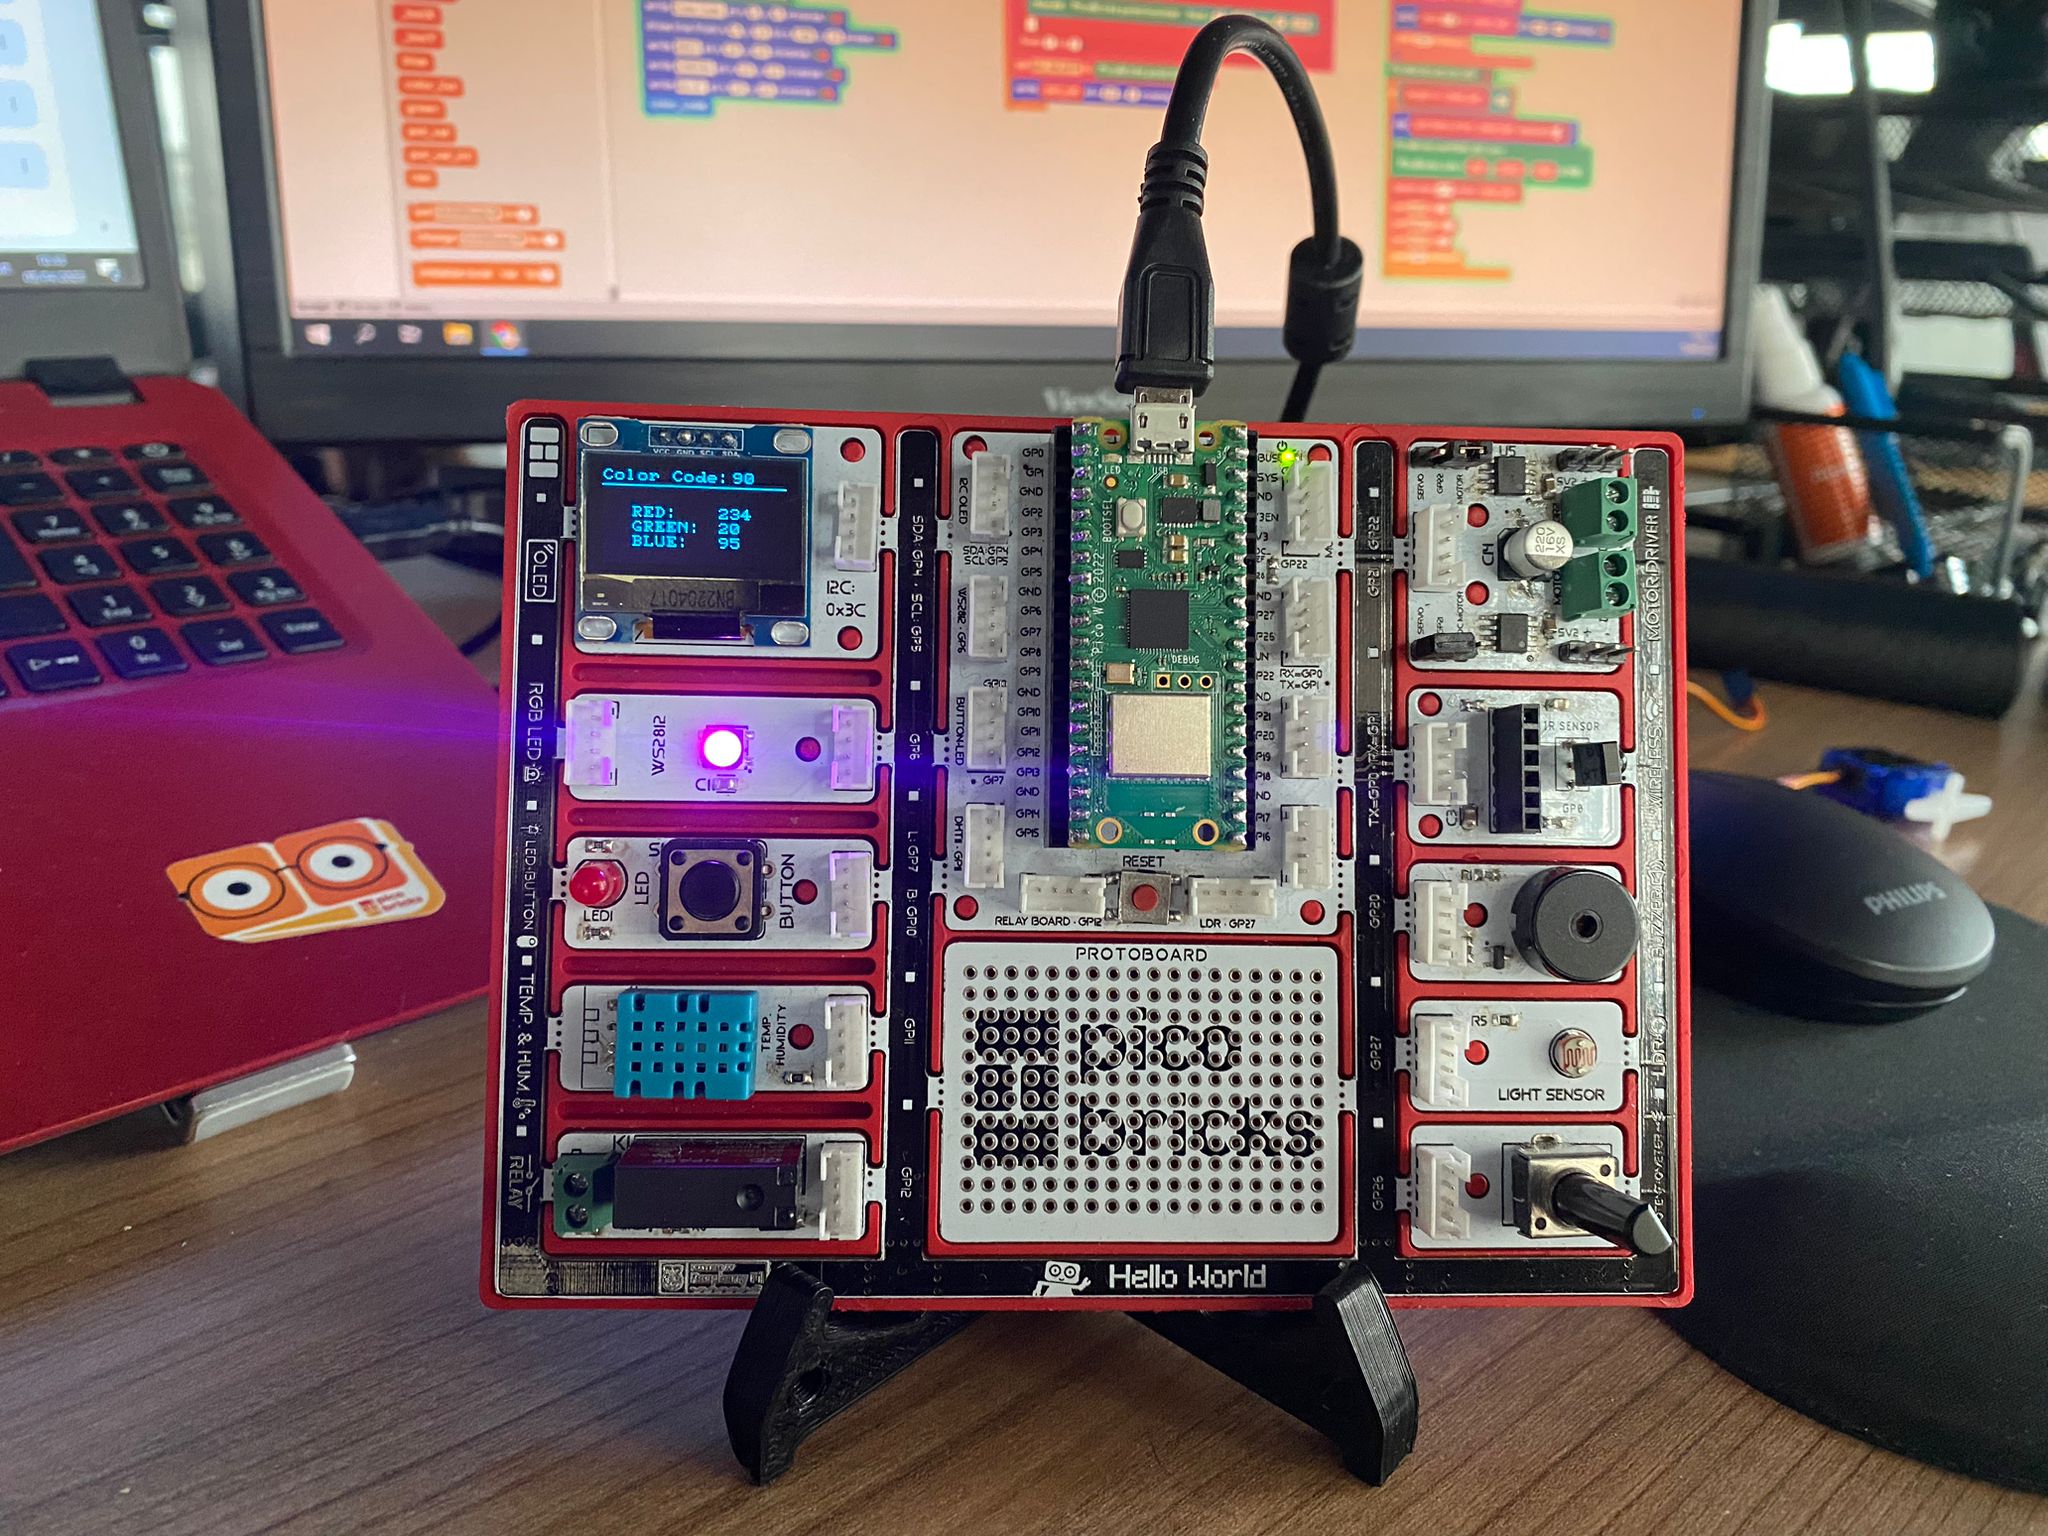
RGB LED Control With PicoBricks and MicroBlocks
You can create any color that you want by using PicoBricks RGB Module.
The Project Video
PicoBricks Modules That You Need
- RGB LED
- OLED Display
- Potentiometer
- Button & Red LED
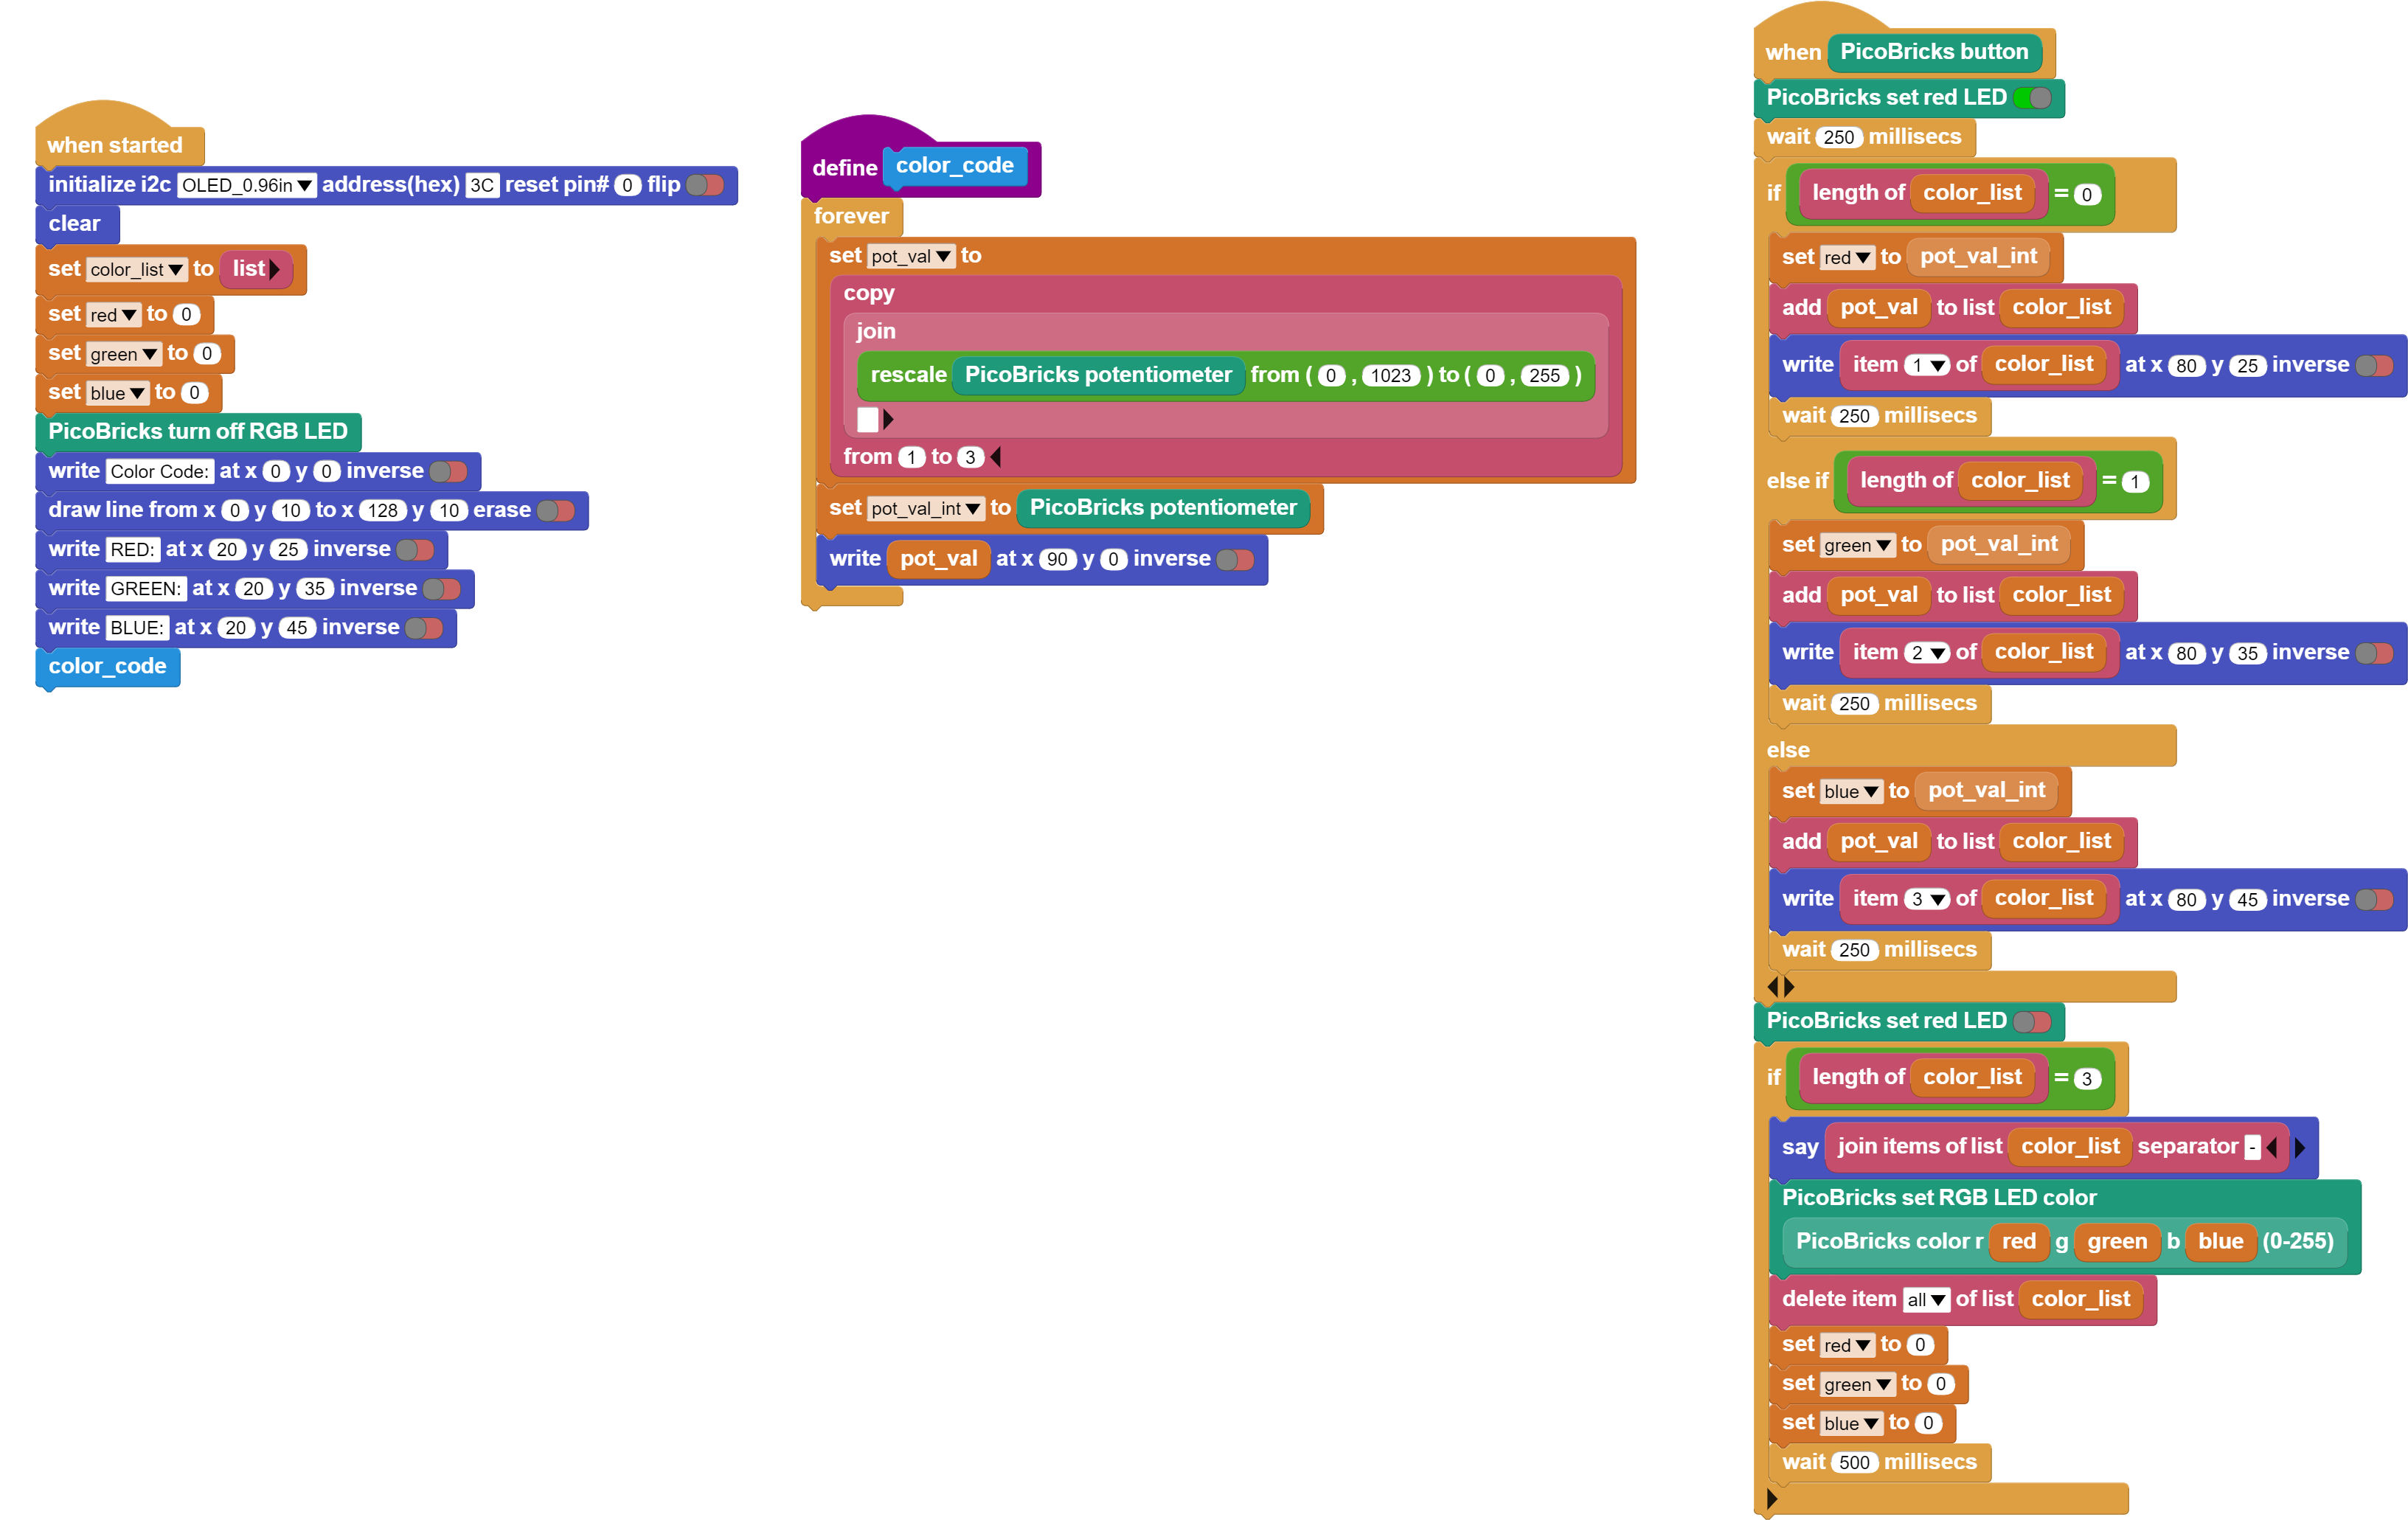
MicroBlocks Code of The Project
Re: ASCII Encryption & Decryption
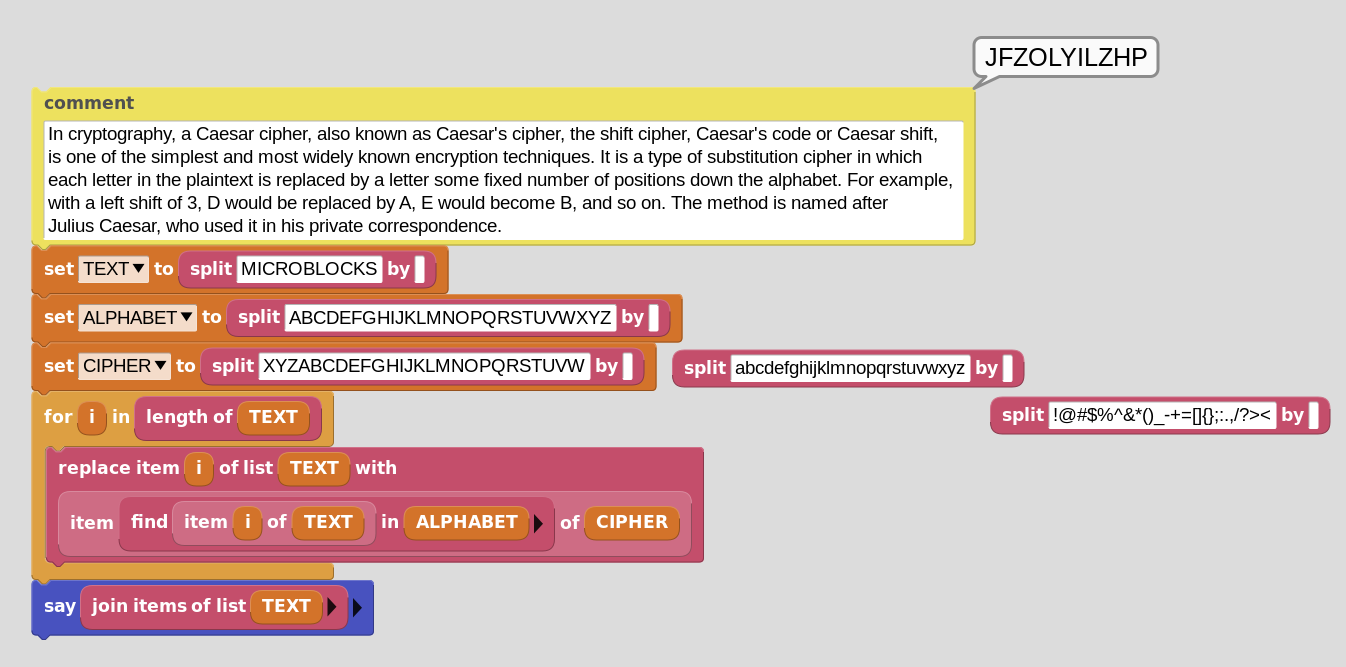
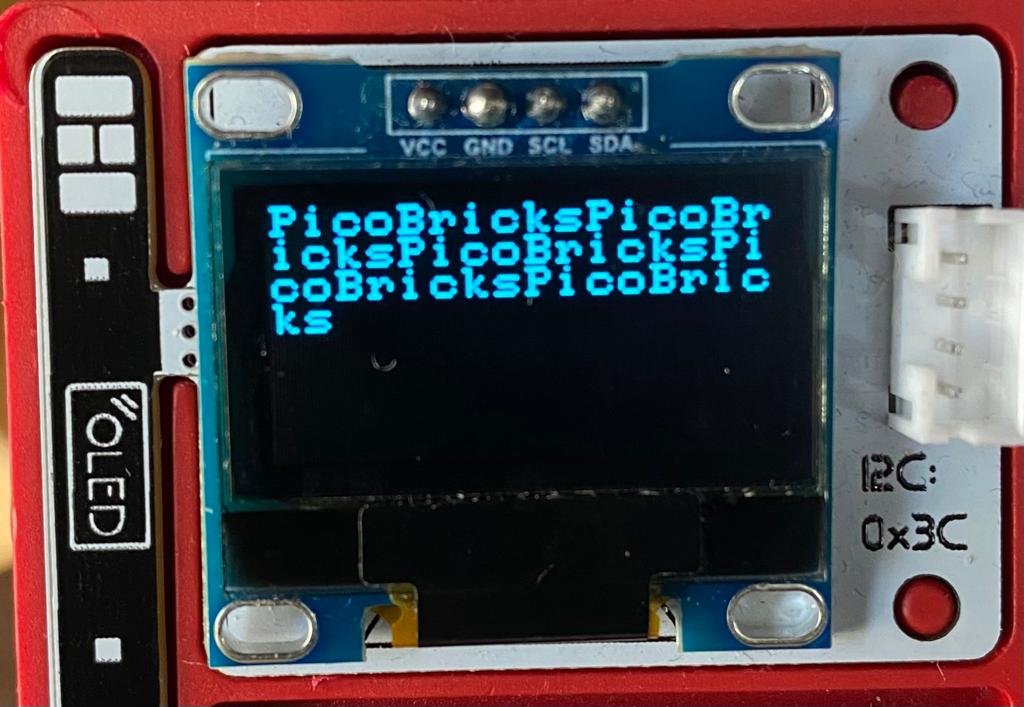
I made a Caesar cipher. You can use this with your OLED screen. You can exchange the loose blocks you see on the image with the cipher variable for different results.
ASCII Encryption & Decryption
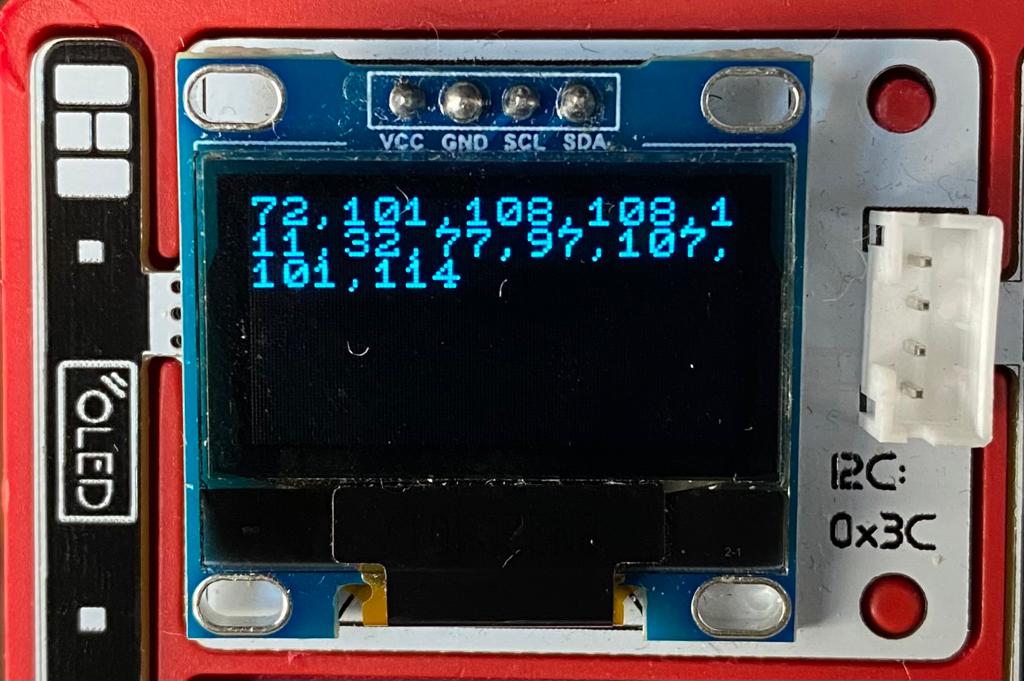
Do you know that by using PicoBricks and MicroBlocks IDE you can automatically decryption a text that we have given as encrypted or you can automatically encrypt a text by using the ASCII character table?
You can use the following MicroBlocks code to encrypt any text you want with PicoBricks by using the ASCII table.
After specifying the text you want to encrypt in the code, each tiem you click the PicoBricks button, you will see the equivalent in ASCII table of letters in the text you want to encrypt in order. After seeing the numerical equivalent of all the characters in the text you want to encrypt in the ASCII table, the encrypted version of the text will appear on both the PicoBricks OLED screen and the MicroBlocks blocks after a 3-second countdown.
MicroBlocks Code of The ASCII Encryption
ASCII Decryption With PicoBricks
With PicoBricks, we can decrypt a given encrypted text by using the ASCII table. For this, you can create the code blocks below and print the encrypted text you specified in the code on the OLED screen of PicoBricks.
MicroBlocks Code of The ASCII Decryption
MicroBlocks and HuskyLens - Enjoy the beauty of AI Machine Vision with Blocks
There is hardly any article in the press that does not tout the wonders of the Artificial Intelligence and the wonderful things one can do with it. A popular application of the technology is using cameras assisted by AI Vision algorithms to recognize objects, colors, faces, lines etc. However, when one decides to play around with it, the actual use ends up being a bit cumbersome for beginners, involving rather complex libraries, development environments, and unintuitive coding.
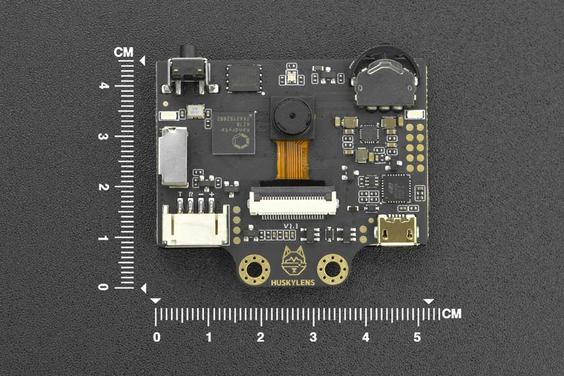
But with MicroBlocks, you can also take part in the exploration without worrying about these barriers. We have developed a Library for the popular HuskyLens unit by DFRobot. Of course, you have to first buy the camera, but after that you will be enjoying the wonderful world of AI Vision and start creating your own projects.
First check out the writeup on our WIKI. The Library is developed 100% with MicroBlocks using the blocks to code each and every functionality; the same as the OLED Display Library. It is a testament to the power of the language and complicated projects you can develop with it.
You will find examples for every block in the library. Just connect your camera to a microcontroller with I2C support available to you (eg: Pico2040, micro:bit v2, etc.) and then drag and drop the various blocks to test the features. Once you get familiar with the working concepts, you are on your way to creating your own projects.
DFRobot Info page can be reached here.
