Best Of
Individual trays
After I separated all the boards, I found that the combined tray didn't work very well. I designed separate trays (one for each board) for use on a 3D printer.
I published my models for those trays at: https://www.printables.com/model/310823-pico-bricks
Enjoy!
Re: Pin guide for Picobricks?
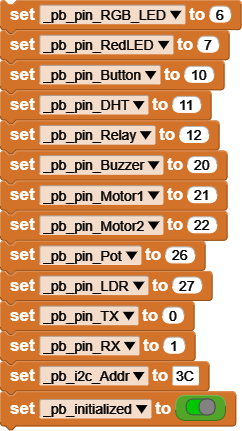
I don't know if this will help you at all, but here are the pin assignments as used by the PicoBricks Library in MicroBlocks.
OLED uses i2c.
ESP01 and Bluetooth modules use the SERIAL pins TX=0 and RX=1.
Both SERVO mode and DC mode motor operations use the same pin assignments for Motor1 and Motor2.
Pin guide for Picobricks?
Hey Picobricks team, I was wondering if you had an image we could use for reference to the picobricks pins?
I can see the written references on the physical picobricks board like GP20 for the buzzer etc. I was hoping for a image (put in the ebook) that is a reference sheet for picobricks without having to go back and look at the specific physical pins that are being used.
Does that make sense? I assume you may have an image on hand for when you had the picobricks manufactured etc.?
Re: Temperature sensor not working
MRedRaider is not saying its not workign with arduino code. his point and the frustration people have is arduino code is not going to be common or exciting for an 8 year old. honestly, as an adult the complicated coding to test if it works is frustrating as its a project for me and my 8 year old. He is not at a point he is interested in programing "code". drag and drop commands with simple instructions and a walkthrough style is what we all expected.
I am in the same level of frustration as red because this is not what we expected when we purchased picobricks and rather than find a solution to the issue you are just blowing us off with a response that it works with computer code.
Re: Temperature sensor not working
Hello everyone,
Some updates have come to Microblocks. DHT11 will work if you try it by updating it via the browser.
Thanks.
Naze
Re: Temperature sensor not working
Hi everyone,
We have found a strange timing problem with the DHT library and fixed it. The new release will include the fix.
Until than, if you want to make the Temperature project (or any project with the DHT11) work reliably, please modify the project code to include a 2 sec delay at the top. Then change the read loop delay to minimal 1 sec.
The 1 sec read interval is a DHT datasheet guidance and was cause of the problem with our library implementation.
Here is the way the new code should look:
You can drag and drop this code image onto the MicroBlocks IDE and run it.
Thanks to @chad helping us debug this problem.
Re: MicroBlocks users from the Netherlands or Belgium?
Let's check this website for your Picobricks, have fun 🖐🏻👏🏻
Re: Temperature sensor not working
@chad and others, experiencing i2c and other errors with MicroBlocks:
Your experiences point to an out of synch condition between the code on the board and the IDE, which can be caused by various things. Regarding DHT module errors, we have made some changes to the firmware to eliminate the problem. It is important that you run a current version of the MicroBlocks / FW which has the fix in it.
Now, without bothering with the reasons of errors, let's see how we can start from a clean slate and get to a running state:
Connect your board and make sure you are running with the latest FW and IDE versions. Best way to do this is to pick the RUN option from the MB web site (http://microblocks.fun/) and then do a FW update. Make sure you select No to the question of Pico W (WiFi).
After the update, remember to click on the USB icon and wait till it is green.
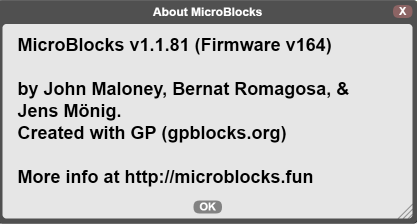
As of Nov.2, after the update, you should see the following version displays from "about" selection in the Settings menu:
Now select File / New to clean the slates on both the board and the IDE.
You are either copying a URL from one of the projects or loading a saved program. Either way, drag and drop the project link or load your code to the IDE. The USB icon will turn grey-ish and show a gradual change to green while the system synchs your code to the board. When it is fully green , you are ready to run.
It is possible that intermittently when you select RUN at this point, you may get an error due to serial port buffers. But don't mind that and select RUN again. We are going to release a version that will fix this intermittent problem very soon.
Your project should run without errors at this point. If for some reason, you are still experiencing problems, please report your cases, as above, with IDE and FW version info, so we can look into it.


